Last updated on 21st February 2022
Imagine this: you’re giving a presentation to your boss, a potential new client, or an important customer. You’re in a groove, and things are going well. Best of all, you’ve got a killer video coming up in your presentation that’s sure to get them excited. But suddenly, you get to your video in your PowerPoint and it wont play.
You lose focus, stumble around to find the video elsewhere (or forego playing it at all), and lose the attention of your once captive audience.
We’ve all been there, and unfortunately, technical difficulties with video can be a huge buzz kill for presenters and audiences alike.
But, when it’s done right, video has the ability to amp up a presentation, get a crowd excited, and share a powerful message with your viewers.
So how do you prevent this all-too-common mishap from ruining your next presentation? Here’s a step-by-step guide to how to embed a video in PowerPoint three different ways.
How to embed a video from your hard drive
Embedding a video into your PowerPoint directly from your hard drive is a great way to ensure your video plays seamlessly, even without an internet connection. When you store a video on your hard drive, it’s accessible to PowerPoint even if you can’t connect to wi-fi, which is an important consideration for people presenting to groups in new environments.
But watch out for a few common stumbling blocks. If you move the video from one folder to another on your hard drive, your PowerPoint presentation may have trouble locating it, leaving you with a blank screen. Also, if you share your PowerPoint with someone via email or USB, and you don’t also share the video with them and re-embed it into the presentation, you’ll be stuck stumbling in front of a confused audience with no playable video content in your PowerPoint.
If you decide to embed a video file from your hard drive into a PowerPoint presentation, here are six simple steps you can take to ensure success.
1. Navigate to the right slide
First, open your PowerPoint file and navigate to the slide that you want to put the video on.
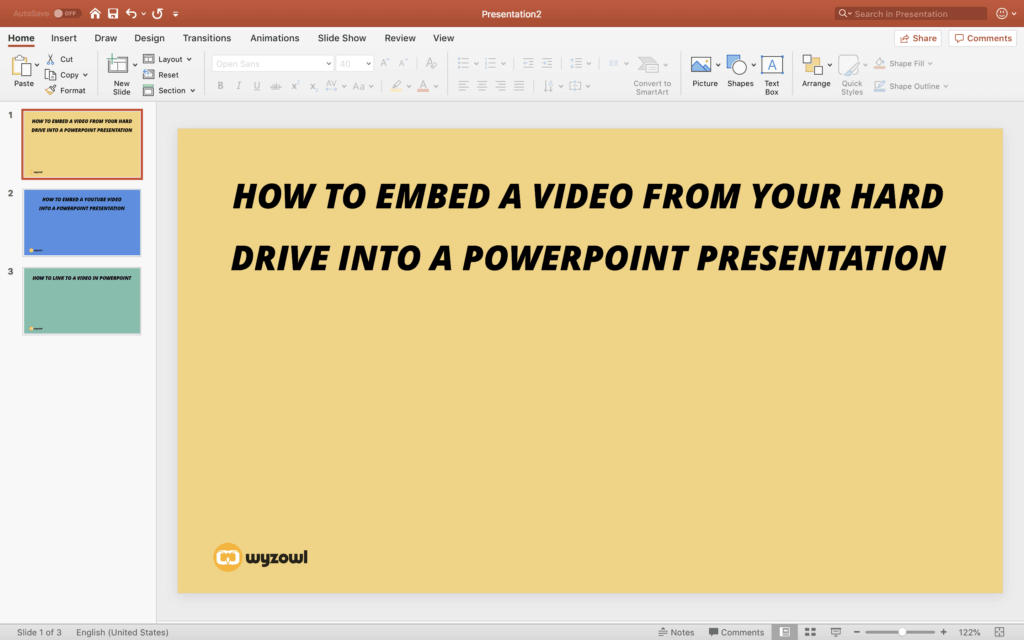
2. Select Insert > Video > From File
Next, navigate to the top PowerPoint menu and select Insert. Then toggle down to Video, and select Movie from File. Be sure you know where your video is saved to make this step quick and easy.
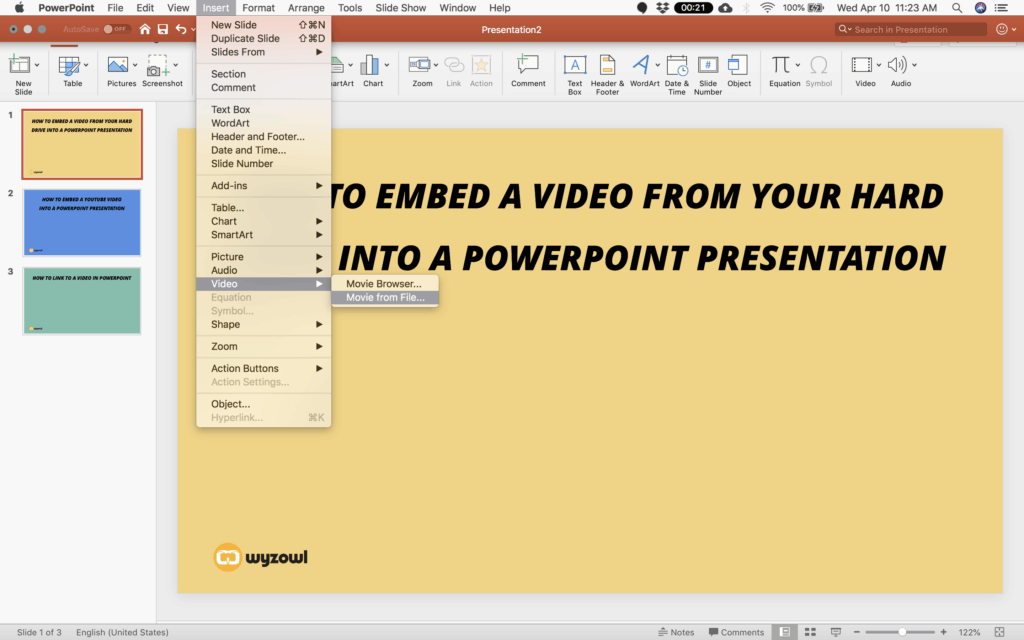
3. Find the video file on your hard drive
From here, find the video on your hard drive. If you have your hard drive synced to a cloud storage system like Dropbox or Google Drive, you could also use a video stored in one of those locations.
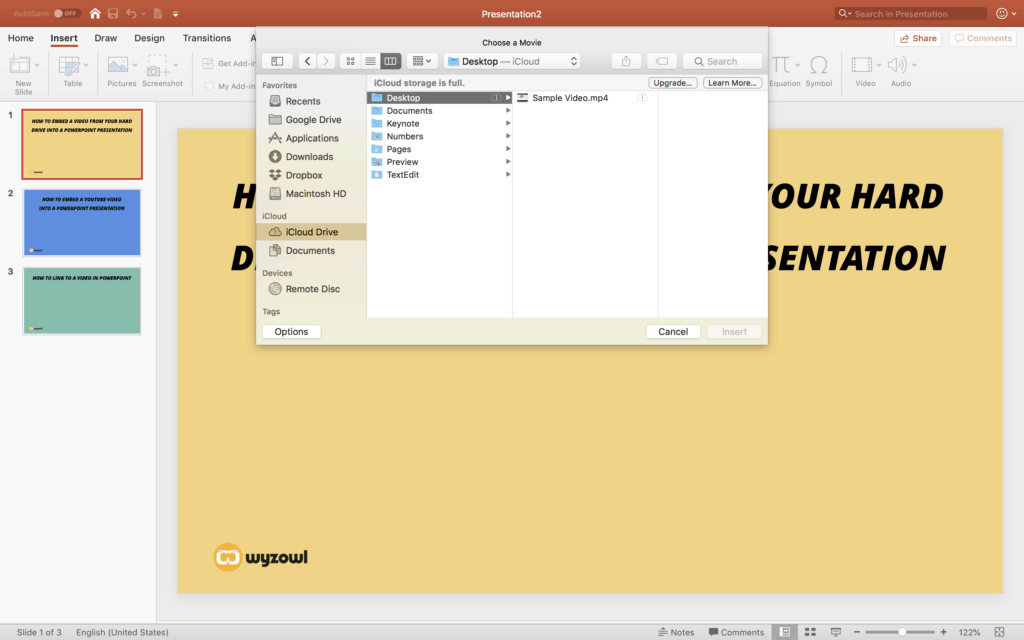
4. Resize the video
Once the video is inserted onto your slide, you’ll want to resize it to fit the slide. PowerPoint may insert the video as a full-screen video – which could be exactly how you want to display it. But if you’re looking to feature a headline or other graphics on your slide, simply resize the video and position it on the slide the same way you would an image or other element.
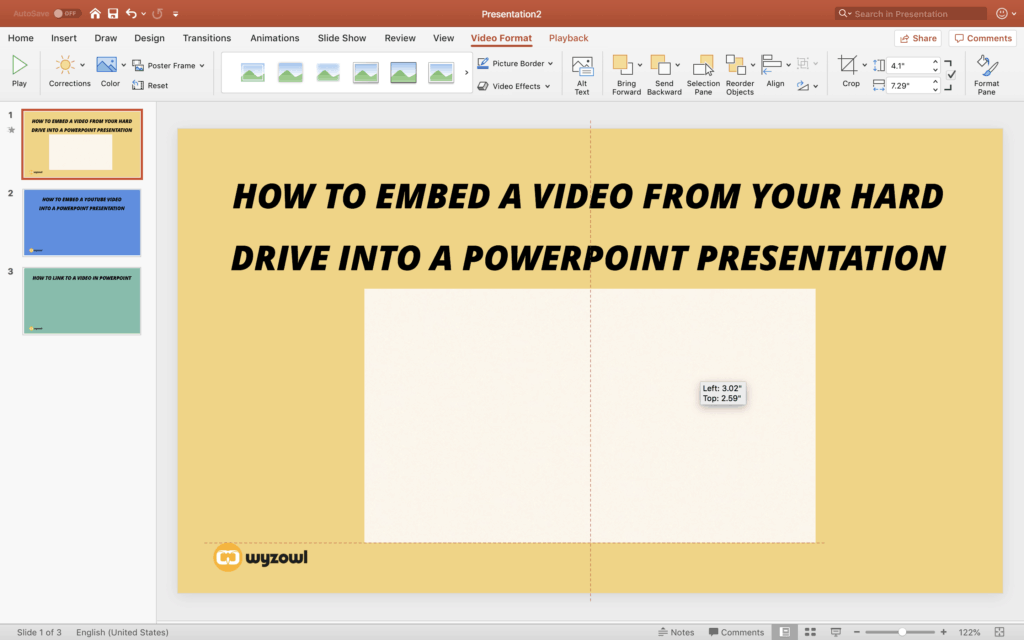
5. Play the video
Testing is critical to ensuring your video embed was successful. The first test you’ll perform is at this step, right after you’ve resized the video. Play the video in the PowerPoint to be sure it fully embedded and that you selected the right file. Be sure you watch from start to finish to ensure the full video embedded successfully.
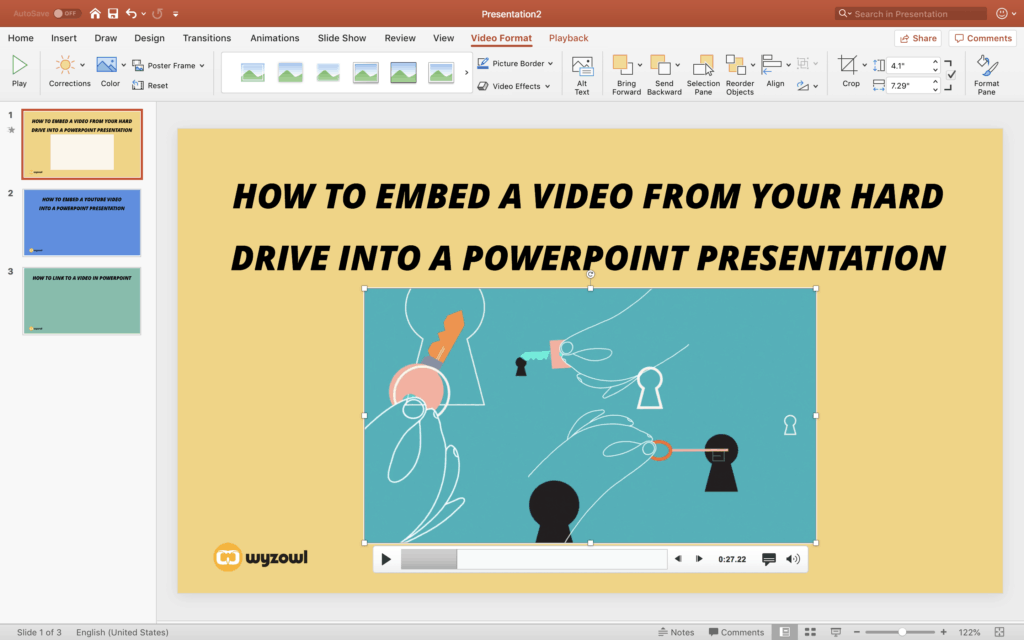
6. Test in Play mode
As the final step in the process and your second test, play the PowerPoint like you will be during your presentation. You should see the video move at normal speed and hear any audio you have in your video as well. Again, be sure to watch the entire video to identify any potential embedding issues.
While you will have tested your video twice at this point, it’s also a good idea to give it a final test on the day of your presentation. This will not only ensure you’re set up for success, but give you confidence knowing your video will play seamlessly.

How to embed a YouTube video in PowerPoint
PowerPoint has come a long way with regards to displaying video into presentations, and this method is proof of that. PowerPoint offers the option to embed a YouTube (or other video platform) video directly from the website in just a few clicks.
This option is the fastest solution and doesn’t involve downloading or storing any video files on your computer, but it does come with a few limitations. First, with this option, YouTube automatically selects the image that appears on the slide, giving you a less customisable look. If image customisation is important to you, check out the next section on how to link to a video from PowerPoint. Second, if you’re not connected to the internet, your video won’t play – an important consideration for people presenting in environments where they don’t have reliable internet access.
While this method comes with a few technical limitations, it’s super easy to implement. If you decide to use this method, here’s how to embed a YouTube video in PowerPoint in just five steps.
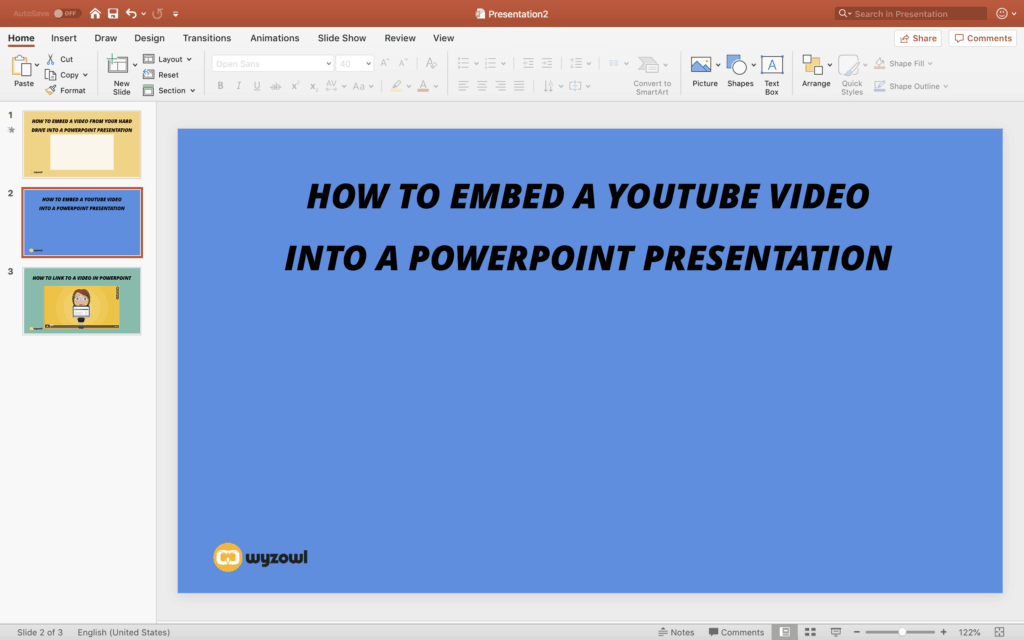
1. Navigate to the right slide
First, open your PowerPoint file and find the slide you want to embed your YouTube video onto.
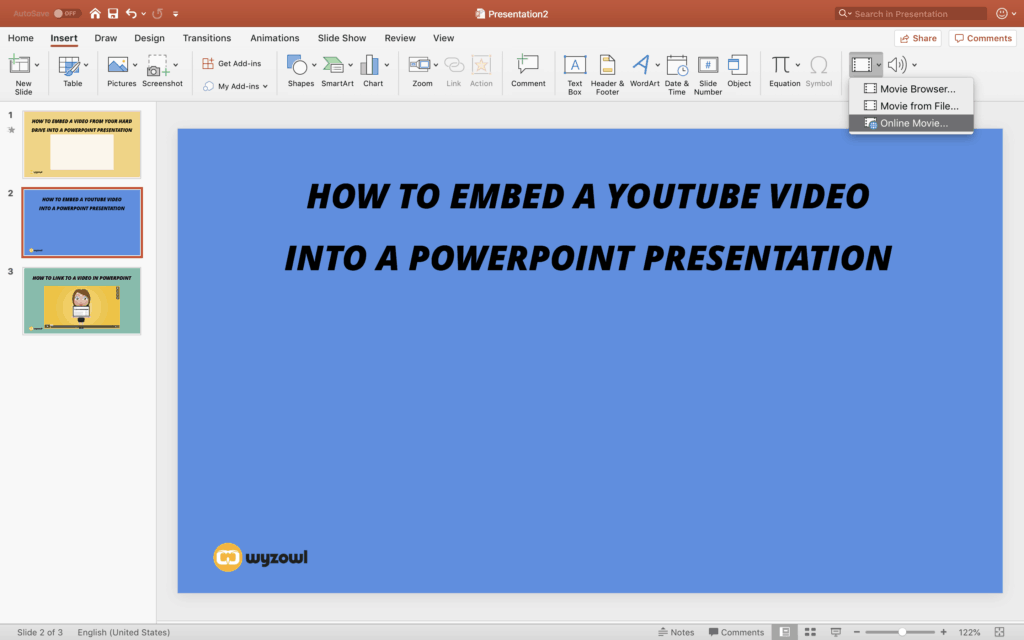
2. Insert an Online Movie
Next, navigate to the Insert tab within PowerPoint’s main menu, and select Video. Then from the dropdown, opt to insert an Online Video.
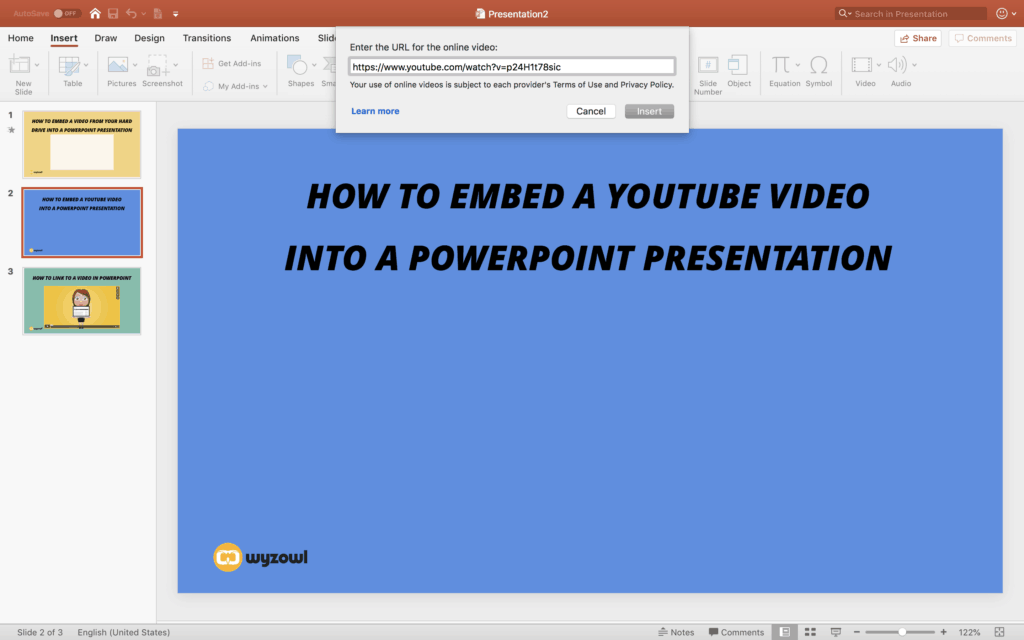
3. Paste your video URL
Selecting insert an Online Video will activate a pop-up to insert a URL. Paste your YouTube link directly into this form field, and select Insert.
4. Resize and position your video
With this method, PowerPoint does all the work. The playable video will appear right on the slide, complete with an image from your video (note that this is the non-customisable part we mentioned). Now all you need to do is resize the video and position it on the slide where you’d like it.
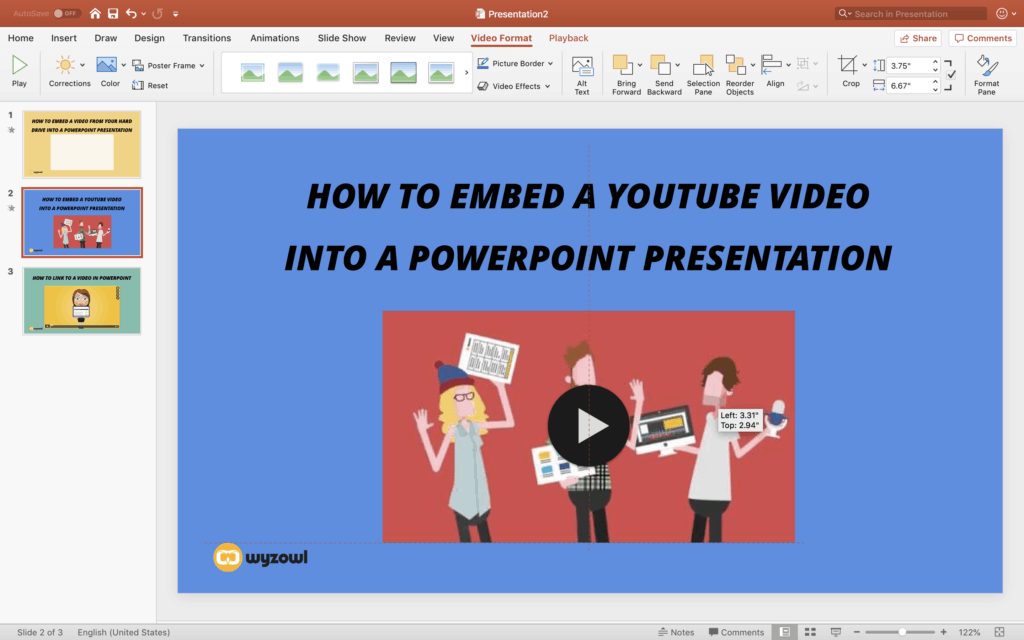
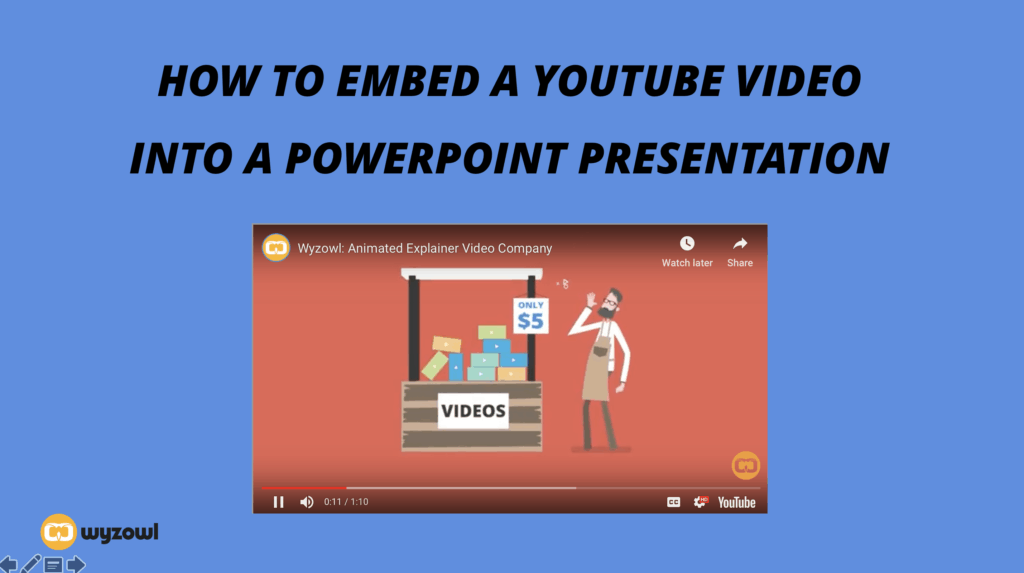
5. Test your video in Play mode
As a final step, hop into Play mode and test the video playback. You’ll even see the YouTube window, along with play and pause buttons, giving your slide an official, buttoned-up feel reminiscent of a website more than a PowerPoint.
How to link to a video from PowerPoint
Linking to a video within your PowerPoint is a great option that’s very customisable. You can link any image or text to a YouTube, Wistia, Vimeo or website link in just a few minutes. But, readers beware: while you don’t have to worry about hosting large files on your computer with this option, web connectivity is critical. You need to have a reliable internet connection for this option to work.
If you’re unsure about your connectivity, we recommend opting to embed a video into your presentation from your hard drive. But if you’re cruising through the digital age at warp internet speed, check out how to link to a video from a PowerPoint in just six steps.
1. Screengrab an image of the video
To link to a video, you’re going to turn an image in your presentation into a hyperlink. The first step in the process is to find the right image – which in this case is a screenshot of your video. Note that you could use any image as your link, but we’re going to focus on the screenshot approach.
To capture a screenshot on a Mac, simply select command + shift + 3. You can also control the parameters of your screen grab by using command + shift + 4 (as seen in the image below). We suggest you play around with both options to determine which works best for you. This action will automatically save the image to your desktop.
To capture a screenshot on a PC, you’ll want to locate the key labeled PrtScn, also known as the print screen key. When you press this key along with the Windows icon key, your computer will take a screenshot of the screen and save it to your Pictures folder. Since this function captures an image of the entire screen, you’ll want to use a photo editor, like Windows Photo Gallery, to crop the image to include only the video thumbnail.
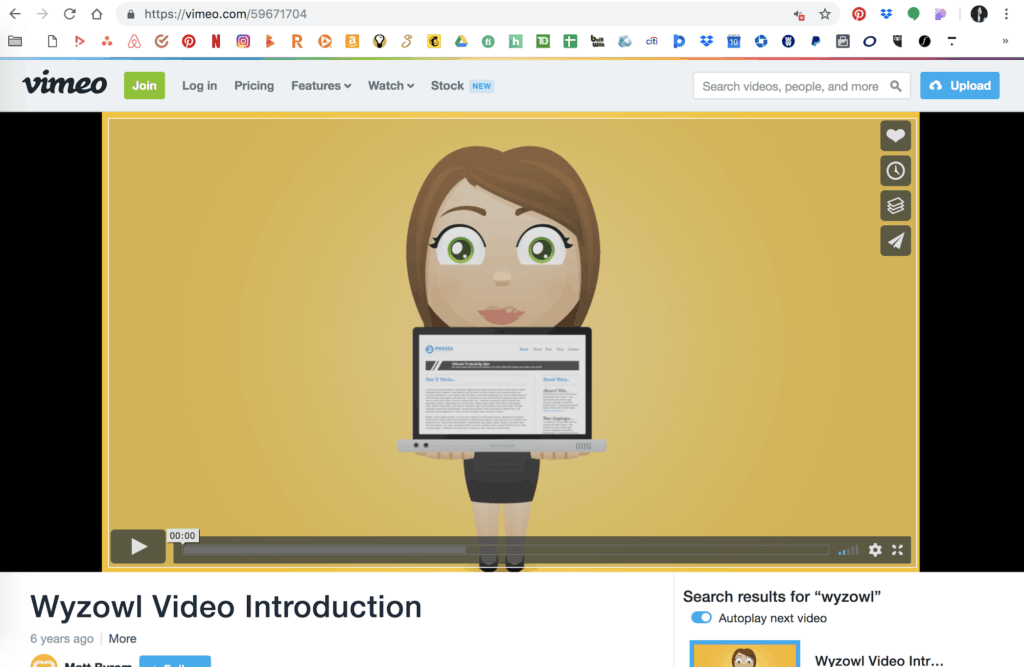
2. Find your PowerPoint slide
After you’ve captured a screenshot of your video, navigate to the slide in the PowerPoint that you want to use to link to your video.
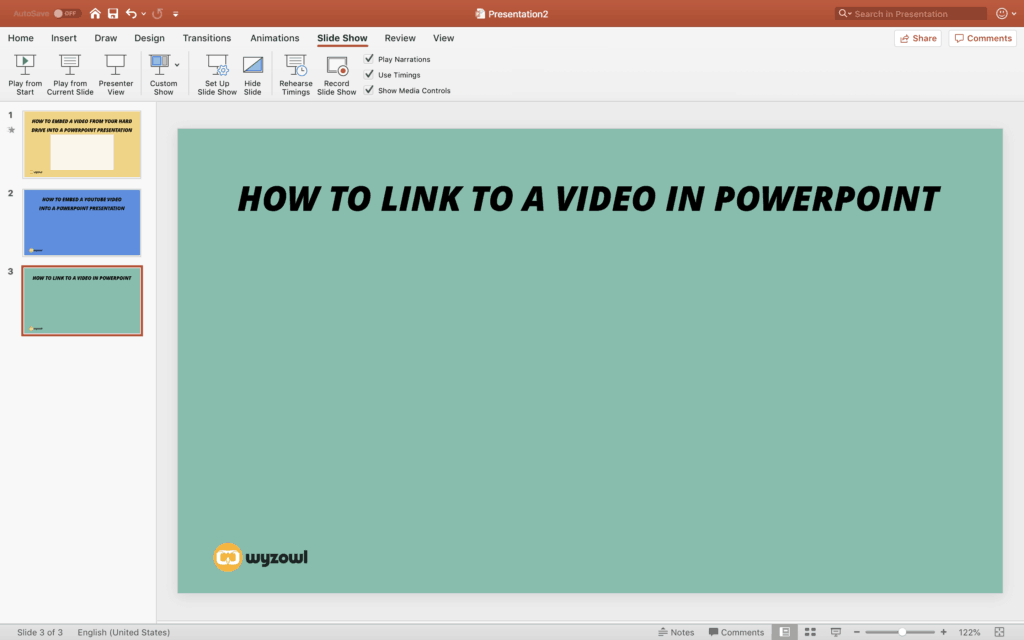
3. Insert your image onto the slide
Next, put the image onto your slide. Select Insert, and toggle down to Picture and select Picture from File.
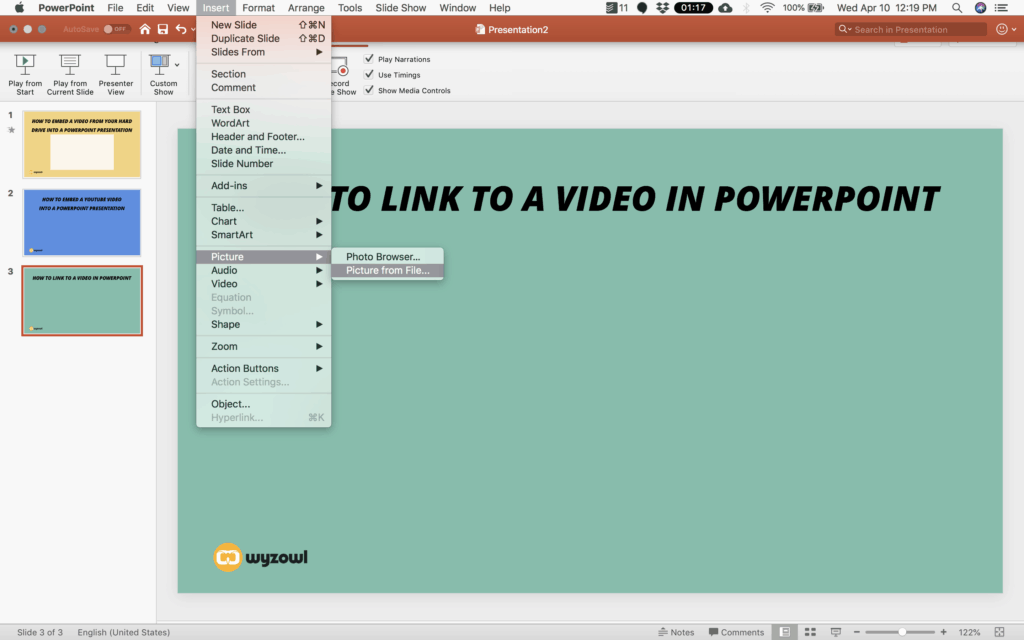
Then find the image you’d like to use to preview your video, and select Insert.

4. Resize your image
Once your image appears on your slide, resize it and position it just like you would any other image.
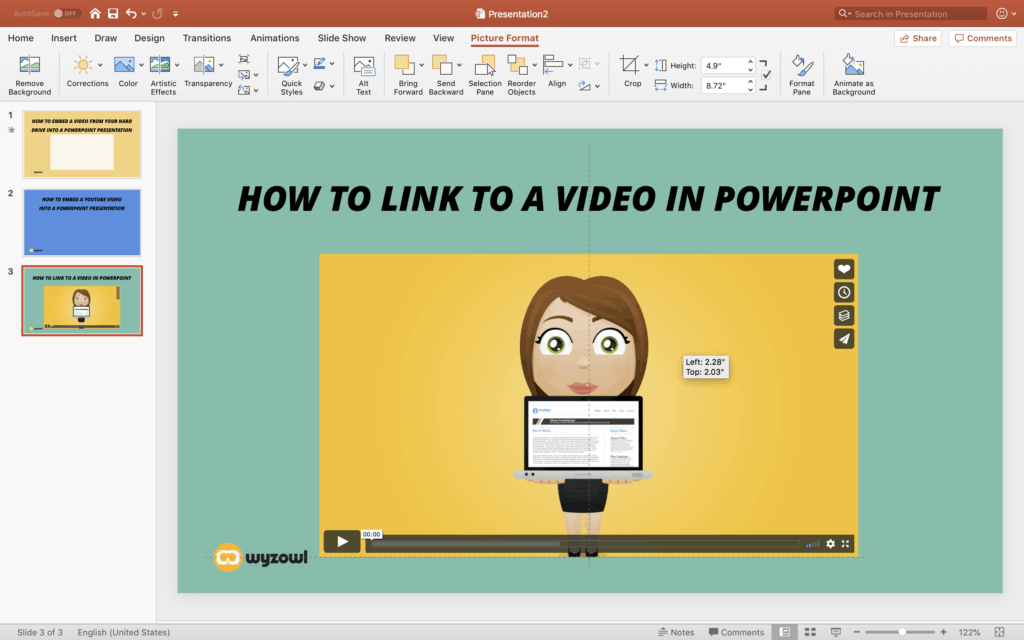
5. Add a hyperlink to the image
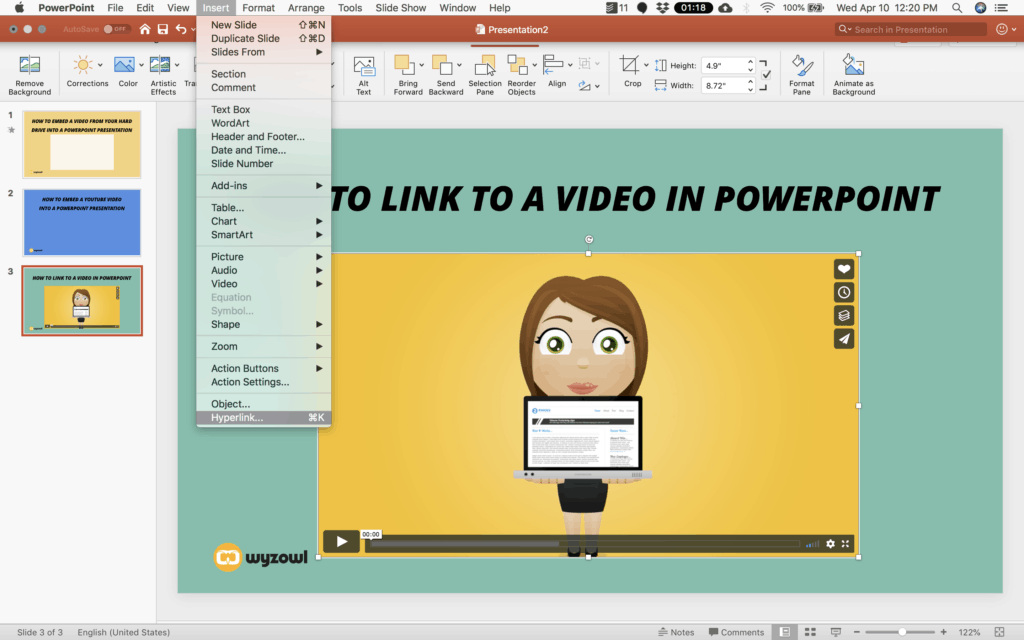
The same way you inserted your video file, you’re going to insert a hyperlink. Navigate to Insert, and toggle down to Hyperlink. Be sure you have the image selected while you’re doing this so the hyperlink connects to the image itself, not the entire slide or another element on the slide.
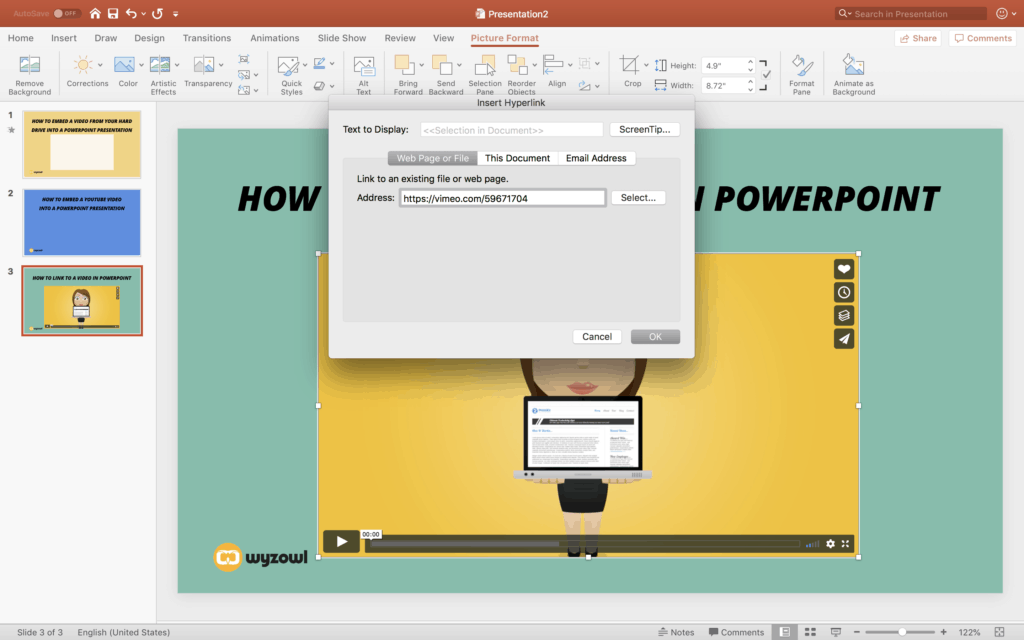
Then copy-and-paste the link to your web video into the hyperlink form field, and select OK.
6. Test the video in Play mode
You guessed it. The final step in the process is to test your video in Play mode to be sure you linked to the right video. You should be able to click on the image in your PowerPoint when you’re in Play mode. And when you click it…

…you should be taken to a web browser where your video appears, ready for you to play!

Final tips
Now that you know how to embed a video in PowerPoint, it’s time to take the final steps to preparing for a phenomenal presentation.
- Test your audio and visuals before you present. If you’re giving a presentation in a new location, you should anticipate issues with their A/V set-up and assume you’ll have wi-fi connectivity issues. Be sure to run through the presentation once before you formally present to ensure the video appears and your audio is both working and loud enough. Also consider taking a wi-fi hot spot in case you encounter internet issues.
- Keep it short. When presenting in front of an audience, sometimes less is more. No one wants to watch a 10-minute long video in the middle of a presentation. The best PowerPoint videos get an audience excited but don’t drag on to the point of boredom.
- Get creative. PowerPoints can be boring – but when you add video, you add a whole new dynamic element and energy to your presentation. Let your mind run wild with ideas as you think of ways to spice up your PowerPoint.
For more awesome tips on how to create the most awe-inspiring, jaw-dropping videos your audience has ever seen, head over to the Wyzowl blog. Peruse posts on the best motion graphics videos around, how to convert a video to a GIF, and everything in between.


