Last updated on 20th November 2023
What is a storyboard?
A storyboard is a sequence of sketches or illustrations that map out the scenes planned for a video.
The video production team then uses this map to ensure that the plot is coherent, engaging, and free of inconsistencies before they start making the video.
Although it may seem like an optional ‘in between’ sort of step, a storyboard is an essential component of video production as it helps to avoid any unnecessary costs or delays.
Types of storyboards
There are a variety of different types of storyboards…
- Traditional storyboard
- Thumbnail storyboards
- Digital storyboards
Let’s take a look at what each of these things mean.
1. Traditional storyboard
Traditional storyboards involve a series of conceptual pencil sketches that help the writer, producer, and director to visualise their initial idea before any filming or animating starts.
These hand-drawn storyboards are still very common in the TV and movie industry today as they allow for changes to be made quickly and inexpensively.
Here’s a storyboard example from the animated TV series, Tom & Jerry:
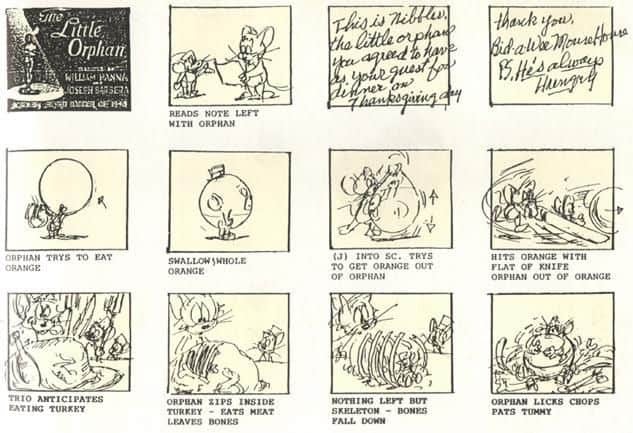
These simple rough sketches, paired with written explanations of what the characters will be doing in each scene, help to assist the animation team in following the sequence correctly.
In truth, traditional storyboards can vary widely in terms of how much detail they include. Some are quite simplistic – using general approximations to demonstrate the overall visual flow and help others involved in the project visualize scenes and understand relevant details while requiring minimal artistic talent! Characters, for example, might be presented as simple stick figures while scenery and backgrounds might not be presented at all.
2. Thumbnail storyboards
A thumbnail storyboard is usually used by a small team–or even a team of one–who already have a good understanding of how they want to visually portray their idea.
These are very quick and easy to create as no text is required and the sketches don’t need to be particularly detailed.
Here’s a storyboard example from the famous shower scene in the movie Psycho:
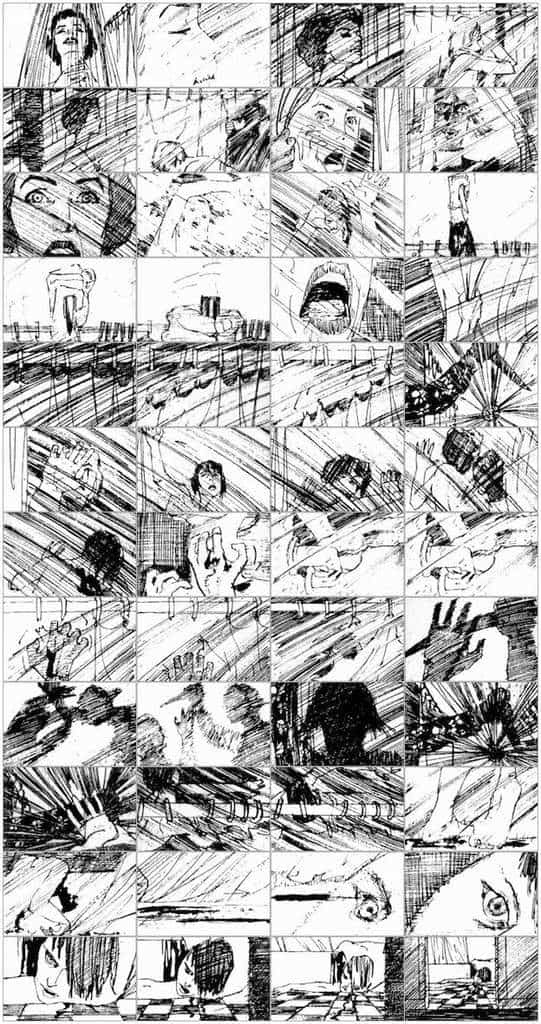
Although there was a large team working on Psycho (as with any large feature film production), Hitchcock was considered an auteur with a very distinct vision when it came to shooting his films, so this storyboard didn’t need to include additional written direction.
Instead, it goes into much more detail visually, showing every single shot exactly as it’s intended to appear in the film.
3. Digital storyboard
A digital storyboard is perfect for a video animation project because you can use the exact graphics that will be shown in the final video.
This allows everyone involved to get a sneak peek into what the end-product will look like.
We use digital storyboards at Wyzowl because all of our graphics are custom-made for our clients, so it’s important to make sure these are accurate before we start animation.
This ensures that there are less changes later down the line and it also allows our clients to have more of an input into how their video will look.
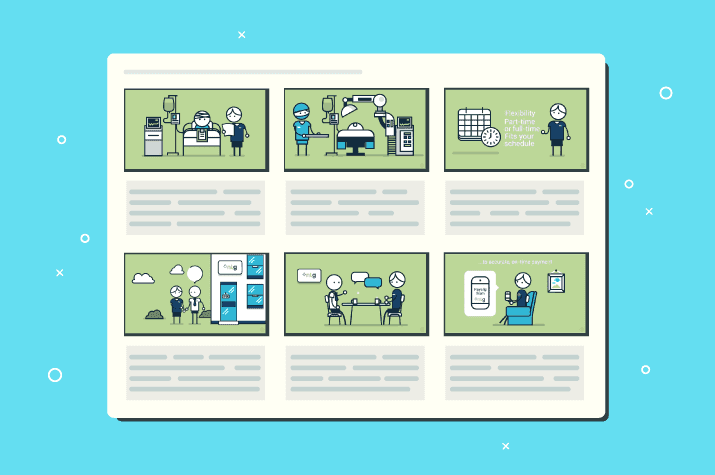
Here is a storyboard for one of our clients, NLG Health:
And here is the completed video:
Notice how we use the exact same graphics featured in the storyboard so there are no unexpected surprises for our clients!
Why use just one?!
If you want to be really thorough, you can make a series of storyboards that get progressively more detailed.
Start with a thumbnail storyboard.
Then add some text to build it into a traditional storyboard.
Then, once you’re happy with that, create your storyboard digitally so that you have a strong, clear vision to follow!
You can sort of see from the storyboard examples above how this process could come together.
Why you need a storyboard for your video
You may be thinking: “I have a script, why do I need a storyboard?”
And the answer is simple:
Video is a visual medium.
It’s so important for all stakeholders to see a visual representation of the script before animation or filming begins because everyone could have a different interpretation of the story.
For example, let’s say your script includes a dancing female character with brown hair.
Without the storyboard, everyone in your team could have a different interpretation of exactly what this character looks like. There are tons of variants:
- Is she short or tall?
- Is her brunette hair long? Messy? Braided?
- Is her dancing sexy? Professional? Funny?
- What does the space around her look like while she dances?
The list is essentially endless.
A storyboard will help you organise all of these thoughts and take ideas from all stakeholders so that you can plan your video more effectively.
Without a storyboard, you could lose time and money re-animating or re-shooting your video.
If there are disagreements between your team, or if changes are required, then it’s much easier to make them at the storyboard stage than when the video has been filmed or animated.
The storyboard is your opportunity to perfect the visuals before you go ahead and create the video.
The storyboarding process
Now, considering that there are different types of videos and different types of storyboards, there are also different ways to make a storyboard.
Here, we’re going to give you a run-down of every step involved. These are:
- Break down your script
- Define your visual style
- Make a list of graphics
- Start drawing
- Add text descriptions
- Include animator/videographer/storyboard artist notes
- Review it with your team
It’s not always essential to follow every single step, so feel free to skip one or two if it doesn’t apply to your video.
1. Break down your script
If you haven’t already broken your script down into scenes, then start by doing that.
There are many different ways to write scripts, and at Wyzowl we like to use a different box – or ‘scene’ – each time the action on screen changes.
Here’s an example:
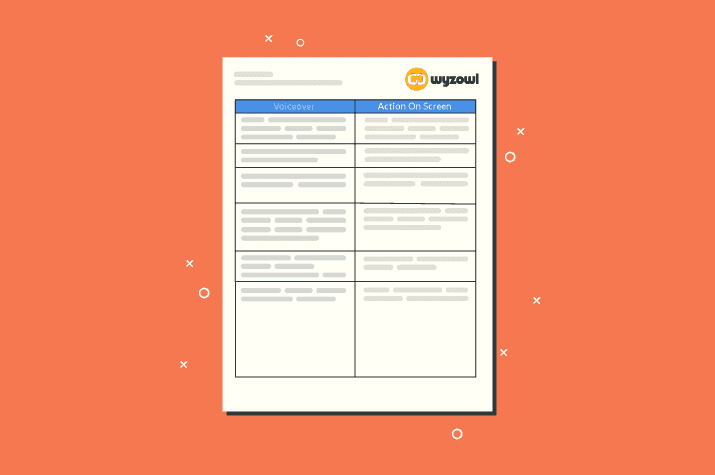
At this stage, it’s important to plan how many panels your storyboard will have and number each one to ensure there is no confusion in the timeline of your video.
Check out this article for more information: How to Write a Video Script (Template Included).
2. Define your visual style
This step is particularly important if you’re working with a client.
Visual style is something that doesn’t necessarily come across through a script, but needs to come across in a storyboard.
Going back to the example of the dancing brunette character, the visual style would determine what her facial features look like and also what the scene around her looks like.
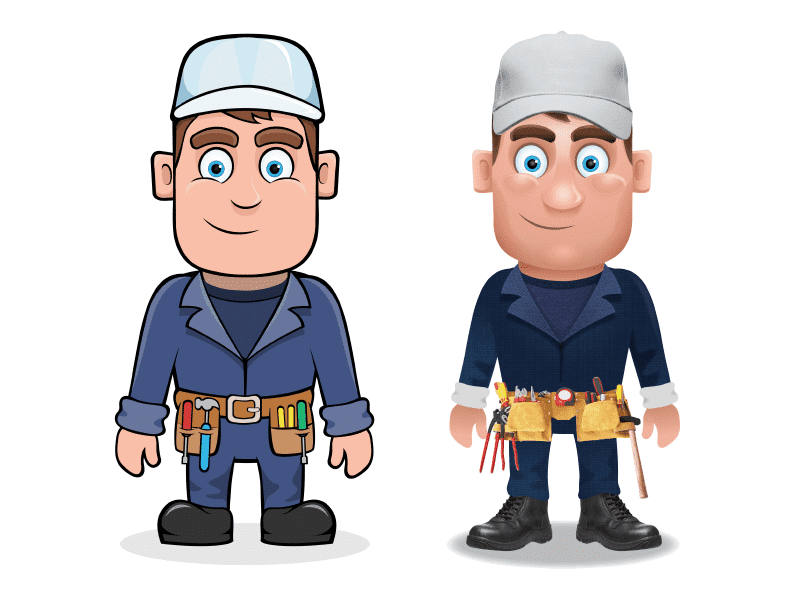
If the video is animated, visual style is even more important. Just look at the difference between this character when he is drawn as a flat illustration vs. a 3D model:
3. Make a list of graphics
After breaking your script down into numbered scenes and determining your visual style, it’s a good idea to create a list of things you need to draw.
Although certainly not essential, this step will help to ensure that nothing is missed from the script.
It also allows you to think about the extra details you want to include in your video before you start recording or animating.
4. Start drawing
This is the fun part!
Choose the type of storyboard that will work best for your project and start drawing. If your video is live action, then we recommend sketching your storyboard on paper.
If it’s animated then we recommend creating a digital storyboard with software like Adobe Illustrator or an equivalent, like Inkscape or Gravit.
5. Add text descriptions
Once you’ve completed the visual part of the storyboard, add text to each scene so that everyone who is going to review the storyboard can follow it.
This could be voiceover, character dialogue, or even just a brief description of what’s happening in each scene.
6. Include animator/videographer/storyboard artist notes
It’s also important to add notes that will direct your animators or videographers. For example, if you want to see a zoom, a pan, a tilt, or a specific transition, add this to your storyboard to inform your team.
These notes can be quick annotations or even just simple arrows that point in the direction you want the camera to move, like this:

7. Review it with your team
The final step in creating a storyboard is to review it with all stakeholders.
One of the most important functions of a storyboard is to prevent costly or difficult changes at later stages in the production, so feedback is very important here.
Gather feedback from everyone involved and then apply any necessary changes to the storyboard.
When everyone is happy, you can move forward to animating/filming!
5 tips & tricks for creating storyboards!
Here are a few ideas for creating a good storyboard.
- Don’t strive for perfection
- Number your storyboard frames
- Be imaginative
- Gather feedback
- Have fun with it!
1. Don’t strive for perfection
Your storyboard is NOT the end product, so don’t agonise over every little detail.
You don’t need to create a new sketch every time one of your characters blinks, you just need to highlight the main points of action on screen. Detailed storyboards can quickly become overkill – it’s not necessarily the place for intricate and layered imagery.
2. Number your storyboard frames
Storyboards are maps for the rest of your production team, and maps need to be easy to read (if you don’t want to get lost!)
By numbering each storyboard frame, you make your storyboard easy to follow and ensure that the storyline of your finished video is coherent before you start recording or animating.
3. Be imaginative
The storyboard process is the first time that anyone in your team is going to see a visual representation of your script.
So when creating your storyboard be sure to spend time going over the script and thinking of the most imaginative way to portray the story visually. Remember to take visual flow into account. The best videos are infused with motion throughout so remember to think about how scenes will transition from one to the next, including things like camera movement where appropriate.
4.Gather feedback
Your storyboard needs to be seen by all stakeholders before you start recording or animating your video.
If not, you could find yourself making some costly changes that could have been easily avoided.
Gather feedback from your entire team and make tweaks to your storyboard until you’re all happy enough to move forward.
But keep in mind that too many cooks can sometimes spoil the broth!
5. Have fun with it!
Being creative and making videos should be fun!
Although there’s a lot to think about and consider, try to also take a step back and enjoy the process.
If you enjoy making your video, that enthusiasm will shine through to your viewers.
Storyboarding tools
The tools you need to create a storyboard will vary depending on what type of storyboard you’re looking to create.
For sketched storyboards you can get by with little more than a piece of paper, although you might find it useful to download a storyboard template which simply lays out boxes for you to scribble in. There are also online storyboarding tools which let you create a storyboard from scratch.
For a more advanced, animated storyboard, like the ones we create at Wyzowl, you’re going to need software. We create graphics for our videos in vector format using Adobe Illustrator and then use good old Google Slides to create a sort of slideshow that lets our clients flick through and get a feel for their explainer video.
Final thoughts
A storyboard is a vital component of the video production process.
It’s a sequence of rough sketches or illustrations that allow you to map out the key scenes planned for your video before production begins.
This allows you to avoid mistakes that may require you to reshoot or reanimate your video, resulting in delays and added costs. A storyboard helps get your whole team on the same page, laying out the key elements and
When getting started with your first storyboard, follow some of the tips in this article and you’ll be well on your way to success. Good luck!
For more information about different types of videos, take a look at our article: How to choose the right style for your explainer video.

