Adding subtitles to your YouTube videos is a great way to increase the accessibility of your video content.
Not only does it make your videos more accessible to viewers who are deaf or hard of hearing – it also opens up your content to viewers who speak other languages, and anyone who prefers reading over listening.
Accurate transcriptions can also help YouTube better understand your content – so it can serve it up more accurately and effectively to your audience.
Bottom line – subtitles allow your videos to reach a wider audience.
And the good news is, it’s super easy to do! Let’s dig into how it’s done.
Step 1: Upload your video
First, upload your video to YouTube as usual if you haven’t already.

Step 2: Open the video in YouTube Studio
Once your video finishes uploading, open YouTube Studio and find your video in the content menu. Click on the video to open the details page.

Step 3: Click “Subtitles”
On the left side of the video details page, click the “Subtitles” option.

Here you’ll see any subtitle languages already set up. The ‘Add Language’ button allows you to add different ones.

Step 4: Review & edit transcriptions and timings
To edit the actual subtitles, click ‘Subtitles’ on the right hand side of the video details page.
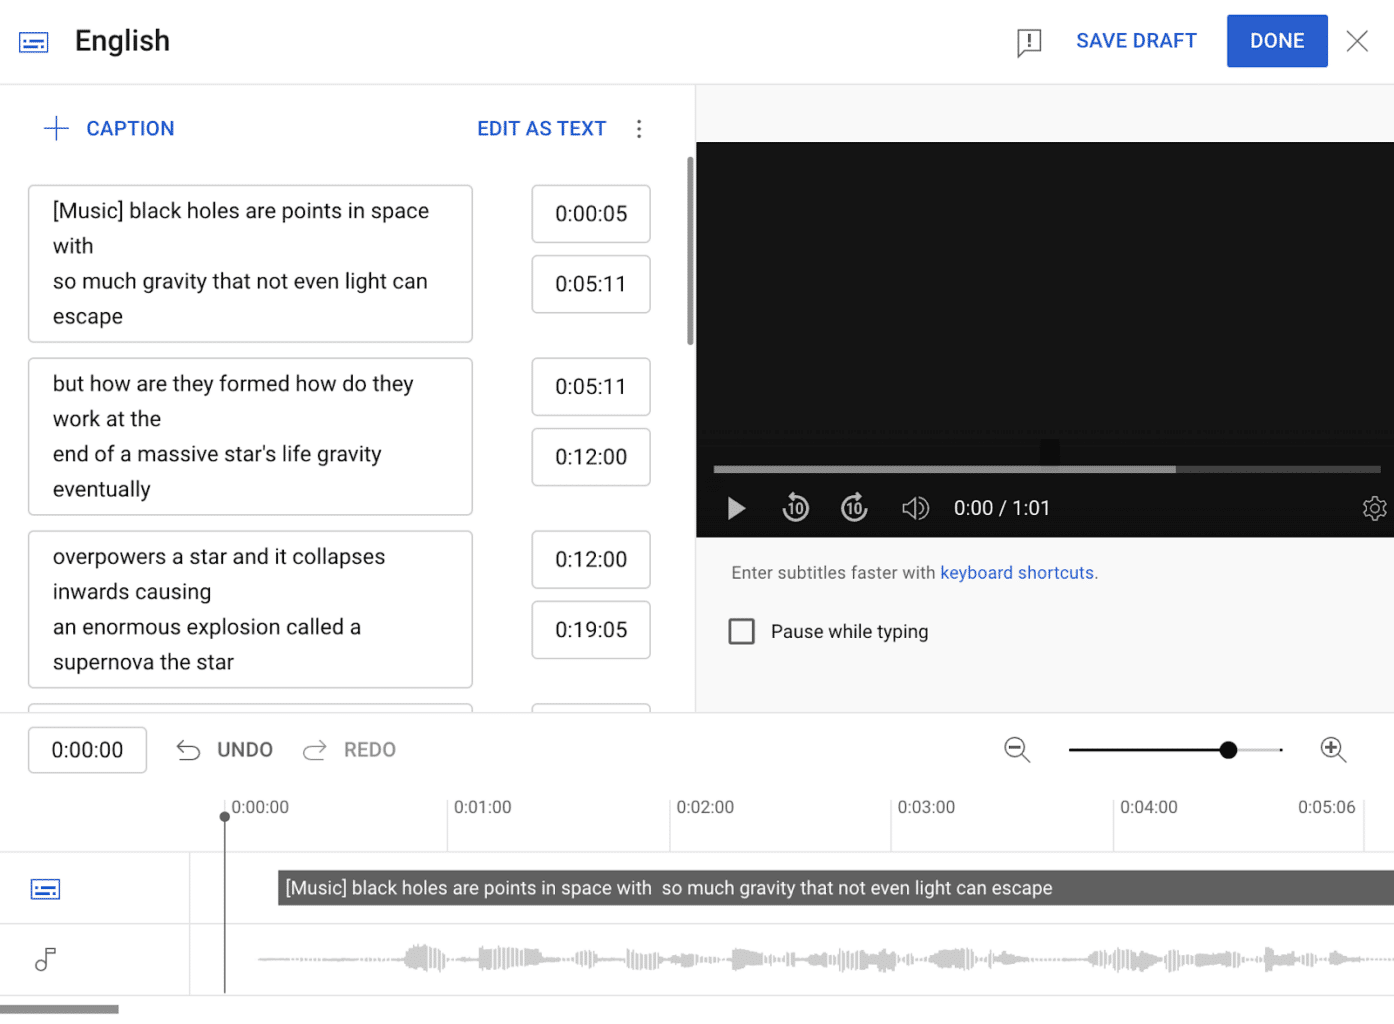
This will bring up a preview of your video with a transcription. YouTube automatically transcribes your video where possible, but it’s good to give this a double check at least.

Clicking the ‘Edit Timings’ button is a very helpful feature. It lets you correct errors and edit the timings in which your subtitles are displayed throughout the video, with a start and end time for each snippet of text.

You can listen to the audio as you add subtitles to make timing easier, and the ‘Pause while typing’ checkbox option even lets you pause the video while you’re making edits, which makes everything a whole lot quicker and simpler.
Make sure to break up long sections of speech into separate subtitles.
Step 5: Save the subtitles
Don’t forget to save your changes when you’re done. Once you’re finished, you can sit back and relax – but keep in mind that changes to subtitles can take up to a few hours to process.
Once processed, languages will then appear as an option for viewers to select when watching your video. Consider adding subtitles in multiple languages to maximise accessibility!
Thanks for reading
And that’s it! With just a few steps, you can make your videos more accessible on YouTube.
The bottom line is that subtitles significantly widen the potential reach of your YouTube videos. And, as we’ve shown, the process of adding them is straightforward within YouTube Studio’s user-friendly interface.
So if you’re looking to expand your audience and boost engagement, be sure to add subtitles to your next YouTube upload.
Accurate transcriptions paired with translations can help you connect with more viewers across the globe – good luck!


